
THURSDAY BASICS: stock up.
My work in Holistic Nutrition is to arm you with the ways the good foods can support you in keeping chronic inflammation at bay. There is no greater tool in my toolkit than today’s topic of conversation. So if this topic is new to you, settle in for a good ride. If you add nothing else to your regimen in 2019, this will be 80% of the work.
It's time to Stock Up.
Welcome to another revisiting of the 2016 series I lovingly called Monday Health Basics; the only difference is, this year, the ideas presented are in a more cohesive order, and they’re showing up in your social media feeds on Thursdays.
My work in Holistic Nutrition is to arm you with the ways the good foods can support you in keeping chronic inflammation at bay. There is no greater tool in my toolkit than today’s topic of conversation. So if this topic is new to you, settle in for a good ride. If you add nothing else to your regimen in 2019, this will be 80% of the work.
STOCK UP.
COLES’ NOTES:
1. Not sure of the difference between Meat Stock and Bone Broth? READ UP.
2. Tried the bone broth but felt worse? READ UP.
3. Who can handle Meat Stock? EVERYONE. Who should reach for Bone Broth? THOSE WHO WANT TO KEEP THE STATUS QUO AT THE GUT LEVEL.
My work is always about reducing low grade chronic inflammation. When you do this work, you actively work at keeping chronic diseases at bay. This is the juicy bits on how the good foods can support you in reducing health complaints, and supporting optimal health in order to garner both QUALITY and QUANTITY of life.
Stock it up, kittens. #meatstockFTW
This blog article is one of the foundational pieces of a gut-supportive protocol. If you do nothing else but add this to your daily regimen, this one thing will do lots of the heavy lifting. Get in the groove, kittens.
It's time to Stock Up.
You have probably heard it by now, and if you haven't, I think you should come out from under that rock.
Bone Broth. Stock. Chicken Stock. Meat Stock.
It's all the rage. And with good reason! This frugal save-your-scraps kind of cooking that our grandmothers' grandmothers were doing, and all grandmothers before them (in all walks of life, and all parts of the world) has been an integral part of the diet in just about every culture around the globe.
Food was never a plentiful thing; grocery stores have only been on the scene since the late 1920s. You used to have to cook from scratch all the time. And you used every morsel you had; nothing was wasted. That is the food with which our bodies and our genetics evolved for countless generations. It's time to bring it back to the table.
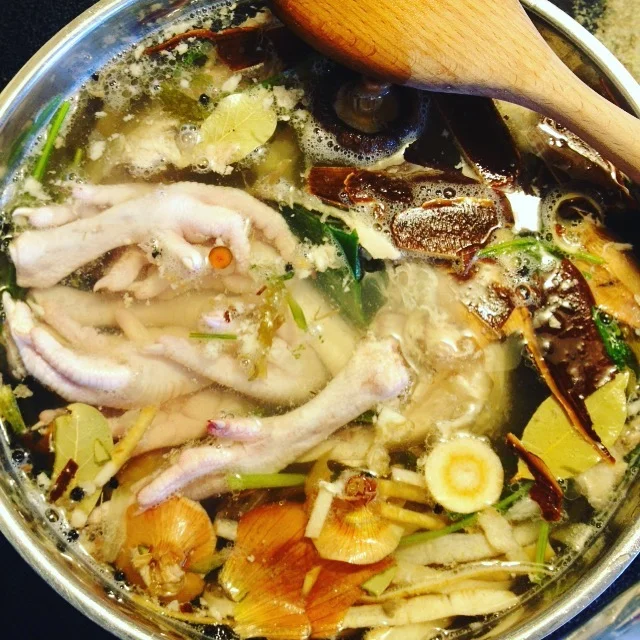
Chicken feet poking out of a chicken meat stock chez moi.
To be clear, we're not talking tetra packs of stock or broth; we're also not talking about the powdered or cubed kind of 'insta-stock' either. Sorry to disappoint.
They won't impart the health benefits that a real deal from scratch kind of meat stock or bone broth will. So know that when I'm referring to meat stock or bone broth in this article, I'm talking about simmering in your own kitchen some bones with or without meat on them, along with a few added tasty things.
Want to bypass the written word here
and just get the gist via a short video? Voila, mon amie!
Meat Stock vs Bone Broth
These terms seem to be interchangeable; and certainly when it comes to following a recipe that calls for either meat stock or broth, you can use easily substitute with what you have on hand. I want to outline here though the difference between a Meat Stock and a Bone Broth in order to help clear up the confusion.
The clarification between the two became crystal clear when I spent a long weekend in Colorado two years ago with the lovely Monica Corrado, a Traditional Foods Chef and Teacher, as well as a Certified Nutritional Consultant who put together a fabulous weekend of cooking for the GAPS Diet, a revolutionary diet from Dr. Natasha Campbell-McBride intended to 'heal and seal' the gut. It was here that I learned there are massive differences between the Meat Stock (let's call it MS) and Bone Broth (let's call this one BB).
A bone broth (BB) is a traditional kind of broth cooked with the bones of an animal for a long time at a wee simmer.
A meat stock (MS) is a shorter cook time of bones with meat on them, on a low simmer. The big difference? The time the bones or bones+meat will simmer for.
MS=short, BB=long. MS=meat+bones, BB=bones.
This is not where the only differences lie, however. If you're like me and are working on improving your gut health, you may have run across a few issues when consuming a long cooked stock.
I remember when my kiddo was wee, I made a vietnamese soup with bone broth I had cooked for the requisite 72 hours they called for in my early days of Nourishing Traditions exploration.
Within an hour and a half of chowing down the good soup, I fell apart. And I mean that quite literally. We were at my kiddo's dance studio at the time; thank goodness my in-laws were there to take her home. I was escorted out the door via the ambulance as I had a pretty violent reaction to this long and slow simmer of a stock as it messed with my body.
I'll spare you the images, but know that it wasn't pretty. They couldn't explain what happened to me, or why I reacted the way I did. They chalked it up to food poisoning; I was left scratching my head as my daughter and I had eaten the same foods, yet she never reacted like I did.
It wasn't until I attended this weekend cooking retreat with Monica Corrado that it all came into focus: this long, slow simmer of a stock was at the root of my troubles that day. And quite a few times since then. I was cooking like the folks who know these things were cooking it; I was following the rules. Why did I feel so rotten?
It is the long, slow process that concentrates amounts of glutamic acid in the final product. Monica goes in to a brilliant explanation on the troubles with glutamic acid for those with digestive complaints in this article, I highly recommend you take the time to read through in order to understand what is happening here.
Her conclusion? For anyone with a compromised digestive system (read: intestinal permeability / autoimmune disorders / any diagnoses with the nervous system like ADHD or seizures or depression or anxiety / any digestive diagnoses like IBS IBD or Celiac), you must stick to the shorter cook times, keeping to a more nutrient-dense short cook meat stock.
Fret not though; bone broth will come in to the picture further on down the road, once some of that support to the gut starts to take hold. Cooking for a shorter time reduces the amount of glutamic acid, which is a substance that can exacerbate any kind of physiological concerns you have that are related to the gut (which is just about everything.)
The other thing to think about when making a meat stock or a bone broth is the amount of histamines in the final product. If histamine overload is a problem for you (migraines, acid reflux, chronic pain, hives, allergies, urticaria) this is important information.
The longer the cook time, the higher the amount of histamines produced in the final product. Whenever there is an issue of histamines, you can rest assured there is a need to look at reducing inflammation in the individual. How to reduce chronic inflammation? Short cook meat stock, to the rescue. Lower in histamines than a long cook BB, the MS will be a nutrient dense way to support your intestinal lining, in order to reduce inflammation at the source and therefore, radiating outwards without adding extra histamines your body has to clear.
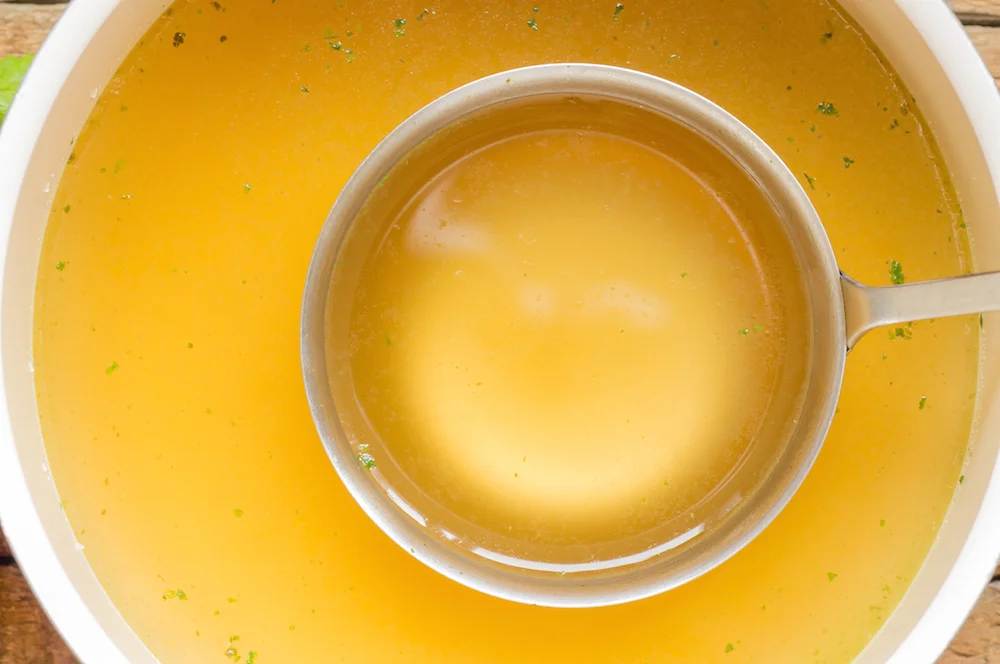
Why make stock or broth?
The health benefits of including this elixir in your dietary regimen are everywhere these days. This stuff is golden when it comes to supporting collagen production in your body, a substance we need for every skin cell in our body including those all important skin cells of our intestinal lining.
MS and BB are both rich in nutrients necessary to support healthy cartilage and connective tissue, including bones. They are easy assimilable forms of protein for the body, making it a super nourishing drink for anyone feeling under the weather or facing a serious health challenge at this time. They're a great source of nutrients when you're in repair or building mode (like say, mending that broken leg of yours or making a baby).
If you or anyone you love has been diagnosed with osteoarthritis, rheumatoid arthritis, scleroderma, psoriasis, any kind of autoimmune disorder including that of the thyroid, any type of digestive disorder like IBS or Crohns; anyone in your life working on a cancer diagnosis, any kind of motor-neuron disorder or degenerative disease like MS or ALS; for the person looking to support mental health and balancing moods or decreasing anxiety; anyone looking to upkeep their body's functions for high performance sports or fitness endeavours; anyone looking to age like a champ; consuming meat stock (and bone broth in some instances or at some point down the road) can be of tremendous support.
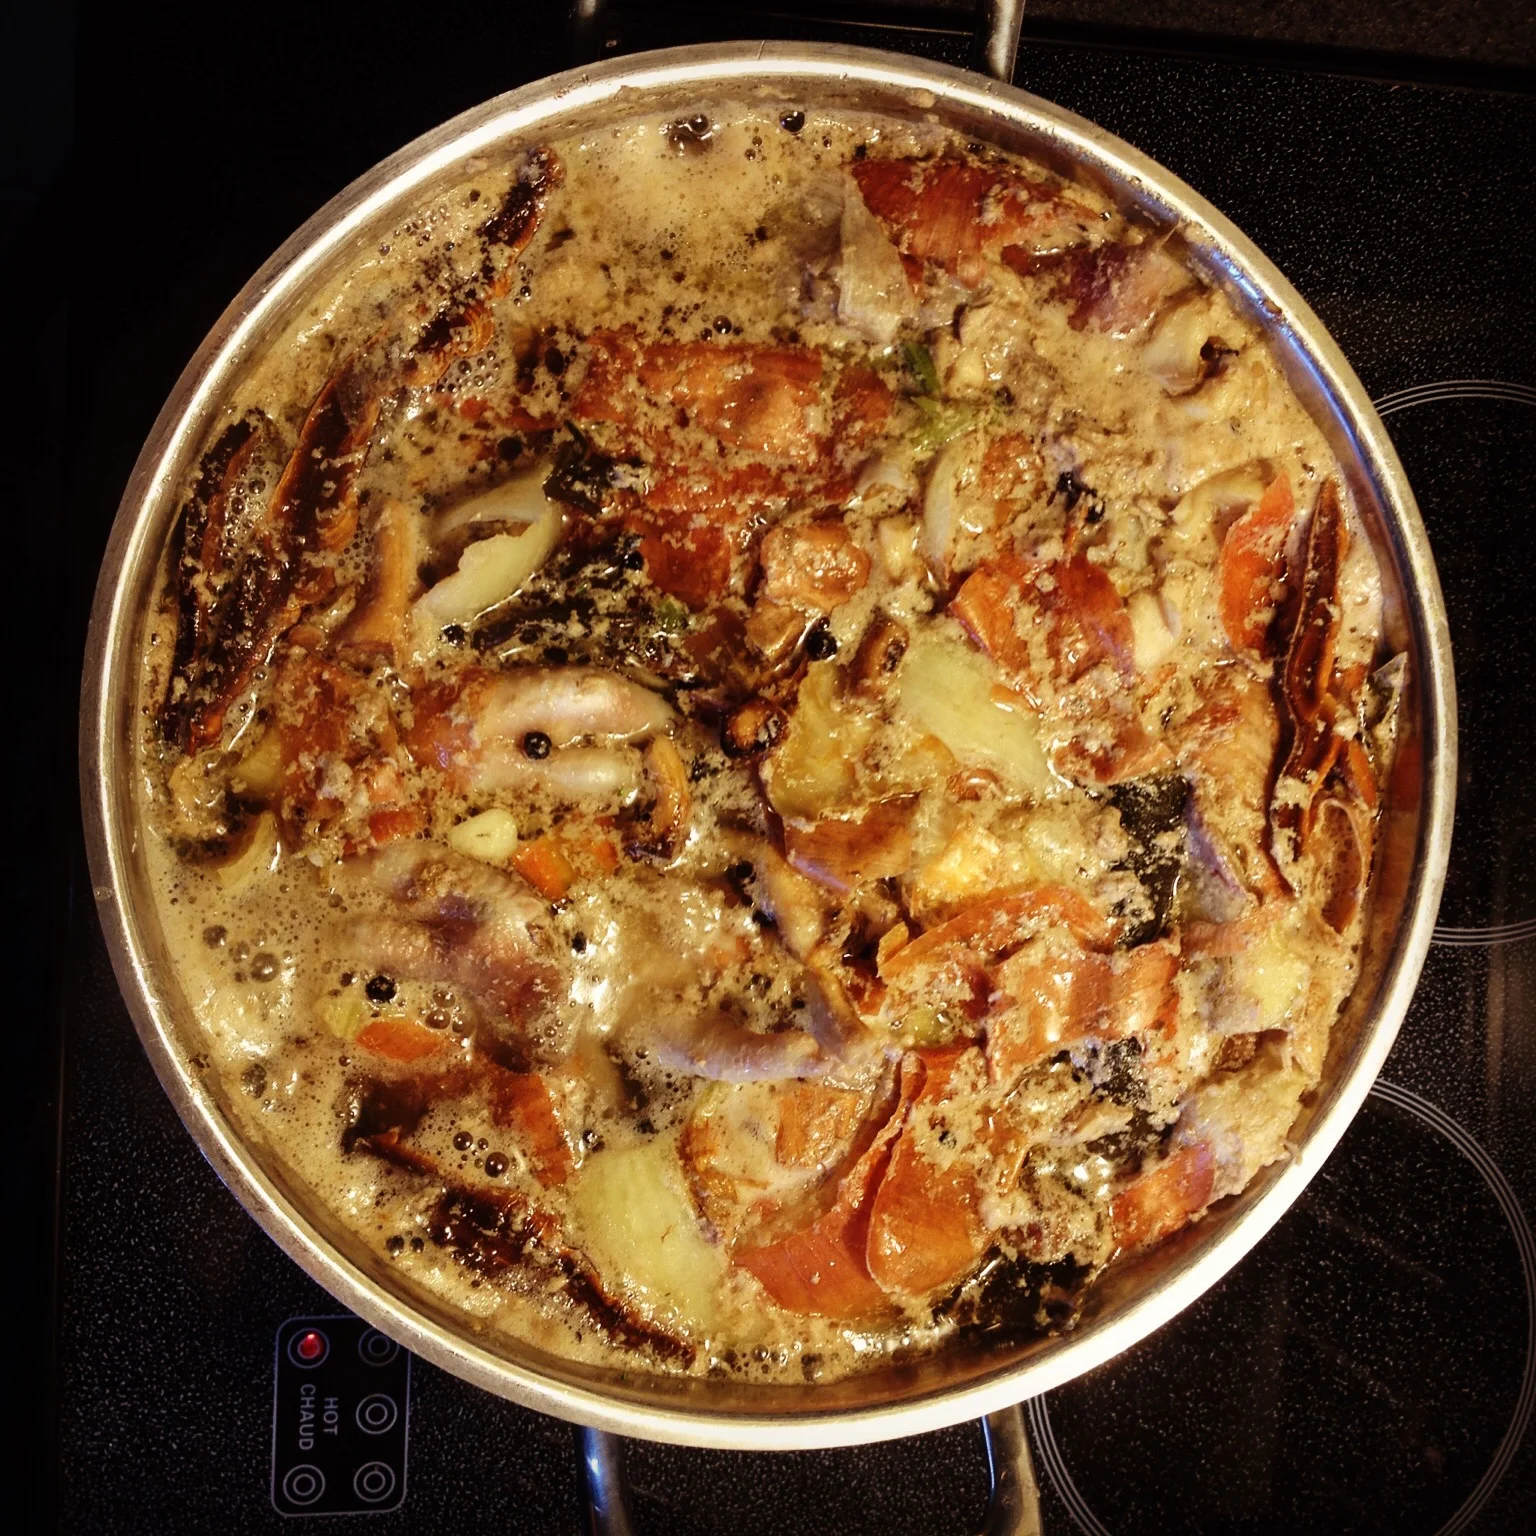
A low, slow simmer is key to making a meat stock that will gel.
Let's go over how to easily make a meat stock. For today's blog post, I am going to stick to a chicken meat stock for the sake of simplicity.
POULTRY MEAT STOCK inspired by Monica Corrado of Simply Being Well
The players
a chicken or duck or quail, whole (if you start to have a glut of chicken meat in your freezer from making this meat stock, opt instead to go with chicken backs and necks, ensuring you add in a package of chicken feet to the mix!)
if you're not too squirmy about it, a package of chicken feet or chicken backs and necks
enough filtered water to cover
add in any extras you wish here (suggestions outlined below)
The How-To
Put your bird and chicken feet / backs / necks in the biggest stock pot you own. Top with enough filtered water to cover your bird, adding in any extras from the list below to the pot.
Turn your stovetop on, bringing the meat stock to a slow and gentle simmer. Skim off any impurities that show up. Allow this brew to bubble for a good hour and a half, with the lid off.
Turn your stove top off; strain your entire soup through a sieve, hanging on to the whole chicken. The juices you have collected are your meat stock. Good work. SAVE THIS AND SAVOUR IT.
The whole chicken you have strained is ready for you to debone, and reserve all of the good meat. This is what you can stash in to little freezer bags or containers and have at the ready for easy and simple meals during weeknights, or to add to salads for a nourishing lunch.
What to do next
Take that meat stock, allow it to cool and pop into containers in the freezer for easy meals.
Fill an ice cube tray with this meat stock and freeze individual ice cubes for those times when you need just a dab of stock to thin a gravy out, or steam some greens or cauliflower, or want to braise a veg.
Drink this stuff like tea; add miso paste to it after heating, add some chopped chives and/or seaweed, swirl an egg in it. A nutrient-dense snack that bigs and littles will love.
Save the meat stock, return the pot to the stovetop and add a good solid cooking fat like duck fat. Saute in this a chopped leek, add a few chopped carrots and celery, a few garlic cloves, toss the shredded chicken in and the meat stock, and add a couple of handfuls of slivered greens like swiss chard and parsley. Adjust the flavours, the S+P to make a delicious stew. If you have some pesto, throw that in the mix to make a chicken pistou stew. (Who doesn't want to make that just to say that's what they made? Chicken Pistou Stew. Say it out loud.)
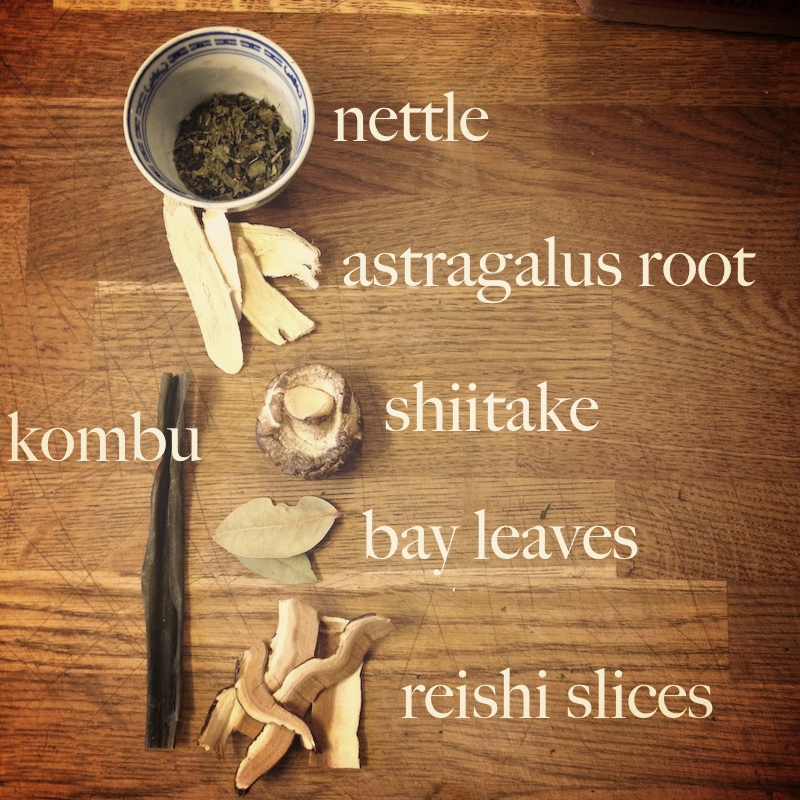
Good add-ins
I love to boost my meat stock with additional herbs or veggies to increase the nutrient density of said stock. Think of adding any number of these things when next you brew. Add them in to the soup pot at the beginning of your meat stock:
a chopped onion (sulfur! Detox superstar! Liver lovin at its best!)
a few chopped carrots and celery (added minerals! And yum flavours!)
any limp looking veggies from your crisper you're wanting to move (except things like kale, radishes, cauliflower or broccoli; their taste is better suited in the final product than in the simmering-stock stage)
a handful of fresh herbs like parsley or rosemary or thyme (minerals + flavours)
a few bay leaves (a traditional flavour for meat stock)
a few dried herbs like nettle or parsley (for anti inflammatory support)
a few peppercorns (a traditional flavour enhancer for meat stock)
a slice of seaweed like the kombu in the photo above (incredible mineral powerhouse, and detox and liver and immune loving support) – any seaweed will do
a few dried shiitake mushrooms (additional immune support)
some medicinal mushrooms like reishi or chaga mushrooms (excellent adaptogens that support adrenals, immune system, everything from head to toe)
additional herbs like astraglus root slices (immune support) or turmeric root slices (incredible anti-inflammatory support)
I keep a freezer bag going in my freezer where I add my vegetable scraps from meal prep during the week. I add the carrot tips, celery leaves, onion skins, garlic skins, carrot greens, parsley stems, fresh shiitake mushroom stems, etc to this bag with the express intention of using it in my next batch of stock. When the bag is full, it's time to put some stock up. (Don't fret about this too much – you're straining these goodies out of the final product.) (Onion skins lend a beautiful golden colour to your stock.)
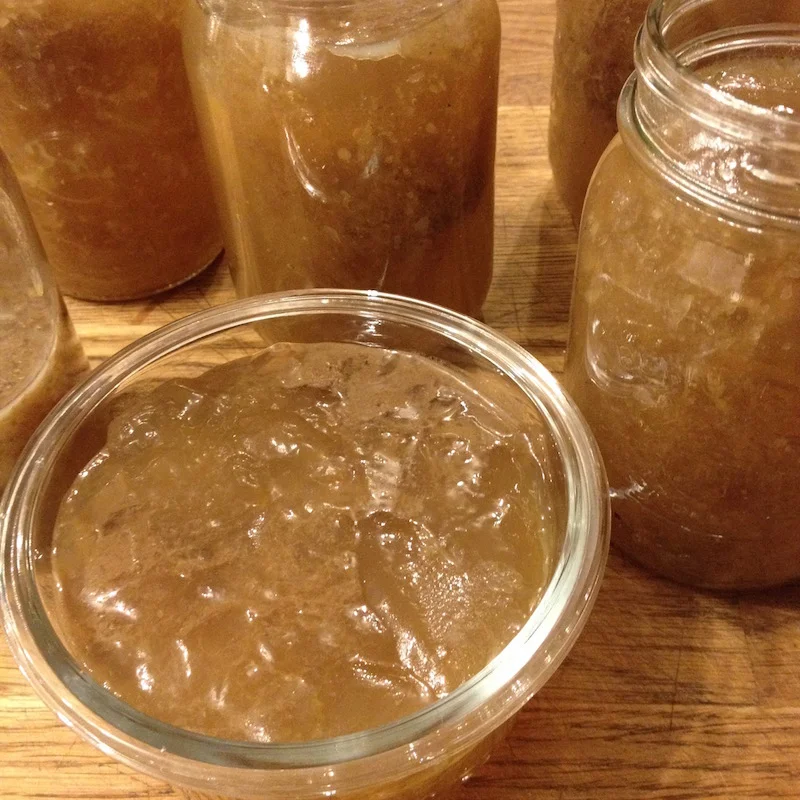
Ready for the freezer.
If you've made your meat stock well, allowing it to come to a slow simmer, not used an excessive amount of water (use enough to cover the bird, and you should be good), your end product should gel upon cooling. This will happen especially if you have some connective-tissue rich feet, heads, necks or backs in the mix; it's worth seeking them out and adding them to the mix!
If it didn't gel, do not despair: this is still good stuff to eat! Adjust your water next time, or keep a more watchful eye to make sure the simmer is slowly bubbling.
Once it has cooled, go ahead and store the goods in the freezer. I'd aim to use it up in 3 months' time; it never lasts that long at our house. We have a weekly soup night; plus I often make myself a good cuppa with an egg swirled in for my breakfast on short-on-time-mornings.
If you're looking for a cookbook that could catapult you in to soup making things and broth and stock recipes, track down Monica Corrado's Grandmother's Kitchen Book. I have a well worn copy that lives in my kitchen and is referred to on a regular basis.
At the same link, you will find Monica's e-book on Meat Stock and Bone Broth, an essential in any kitchen looking to support gut health. You may also want to purchase a copy of the wonderful book Nourishing Broth: An Old-Fashioned Remedy for the Modern World by Sally Fallon Morell and Kaayla T. Daniel. While they do not differentiate between a meat stock and bone broth in this cookbook, you will find this book has myriad recipes and ways to use the nourishing stocks and broths you will be making. Delicious recipes!
OK friend. You got this. Go make some meat stock. And play with your food, if you please'm.
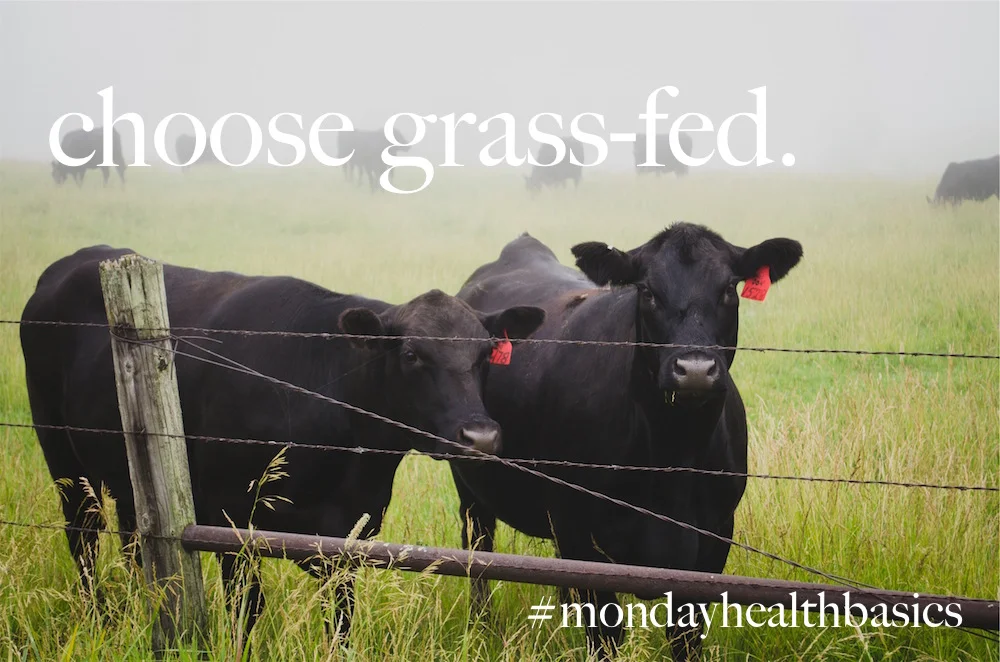
THURSDAY BASICS: choose pastured.
This week's topic is one that can be a bit of a hot button topic for some, and while I love a good debate, I will be talking simpler here. The impetus behind these weekly blog posts is to get the discussion going on how to choose our foods and make those lifestyle choices that are in support of optimal health, not to stir the pot. So this week's topic is about choosing meats, and reaching for grass-fed or pastured options when you're able to.
Another Thursday, another revisit to the now-rejigged Monday Health Basics from 2016.
This week’s topic is one that I share with each and every client that comes in for their first appointment with me. I think it’s also one of the most important things when looking for support in Holistic Nutrition: HOW + WHERE TO SOURCE YOUR ANIMAL PRODUCTS.
If this is the only blog post you read from me this year, you done good.
CHOOSE PASTURED.
COLES’ NOTES:
1. Necessary source of hard-to-find anti-inflammatory fat soluble vitamins (A, D, E, K2)
2. Necessary source of hard-to-find anti-inflammatory Essential Fatty Acids (Omega 3s)
3. Necessary for the health of your gut microbiome + intestinal health
My work is always about reducing low grade chronic inflammation. When you do this work, you actively work at keeping chronic diseases at bay. Reaching for pastured or grass-fed sources when including animal products (meats + fats!)? This is something to prioritize if you wish to stay well.
This week's topic is one that can be a bit of a hot button topic for some, and while I love a good debate, I will be talking simpler here. The impetus behind these weekly blog posts is to get the discussion going on how to choose our foods and make those lifestyle choices that are in support of optimal health, not to stir the pot. So this week's topic is about choosing meats, and reaching for grass-fed or pastured options when you're able to.
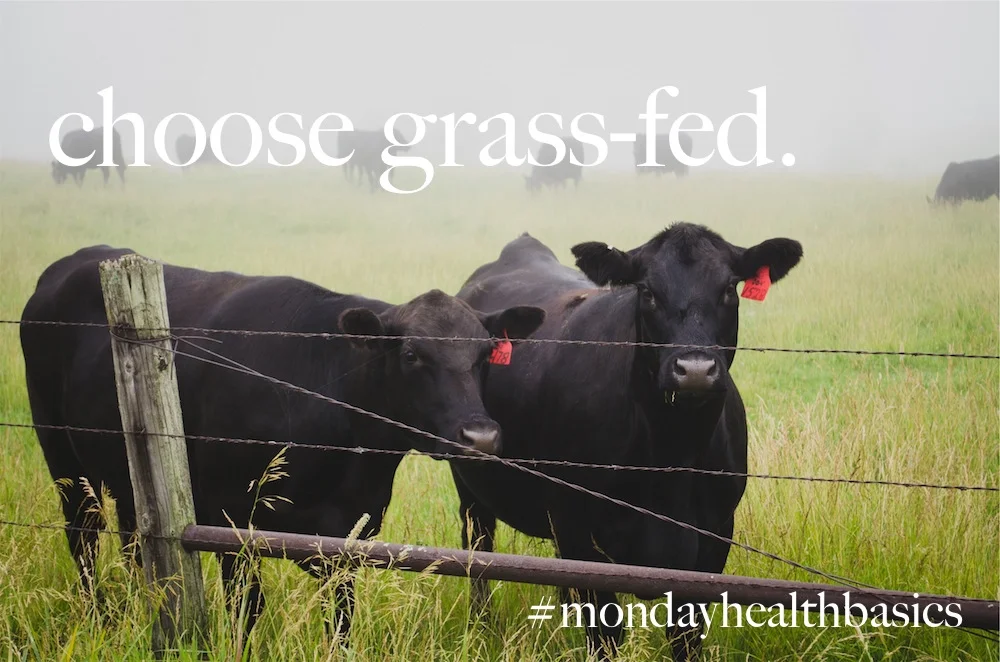
This blog post is not a debate on whether or not to eat meat.
This blog post is not about the environmental impact of animals. (In fact, if ever you have a free three hour block, I'd love to chat about how animals can be of incredible benefit to the maintenance and building of our soils, adding those good minerals and compounds necessary to maintaining healthy soil, which means healthy produce. The status of our soils, friends! It's impacting everything! Barring our three hour convo, check out Joel Salatin either for his approach to farming as stated on his website, or in the chapter where author Michael Pollan visits Salatin's farm and has a pretty insightful conversation in the necessary-read The Omnivore's Dilemma. First and foremost, Salatin considers himself a grass farmer. The animals on his farm just help to grow grass and build soil.)
This is about The Minding and Keeping Of You.
GRASS FED/PASTURED vs CONVENTIONAL
So what does it mean to purchase meat that is grass-fed, or pastured, or grass-fed/grain-finished and how does it differ from conventionally raised meat? It turns out that what the animal eats during its life can have a pretty big impact on the quality of the food.

For the animal allowed to live on pasture when possible, their diet closely resembles what has been a traditional diet for that animal for the last few hundred years. It is a low-stress way of living for the most part, and allows for the animal to munch on the foods they have been designed to consume. These foods are incredibly nourishing to the animal, providing key nutrients and easy-to-digest foods so that they can develop and grow at a natural and normal rate.
What does this mean for us?
The meat from these animals then is low in inflammatory compounds, seeing that the animal was able to consume foods as it was meant to consume. This means your pastured beef and bison will provide you with a good source of the anti-inflammatory powerhouse Omega 3 Fatty Acid, along with other fat-soluble vitamins and their precursors A and E, essential vitamins to retain the integrity of our intestinal lining, our skin and keeping free radical damage at bay. Throw in D3 and K2 in the mix, higher in some animals’ fats than others, but good sources all-round. We need these for most systems in the body, including depositing minerals where we want them (bones! teeth!) and not where they aren’t wanted (arteries! gallbladder! kidneys!).
As if these antioxidants weren't enough, important compounds glutathione and super-oxide dismutase, also antioxidant powerhouses are in good numbers in grass-fed products. These nutrients are necessary for keeping our engines and liver running clean.
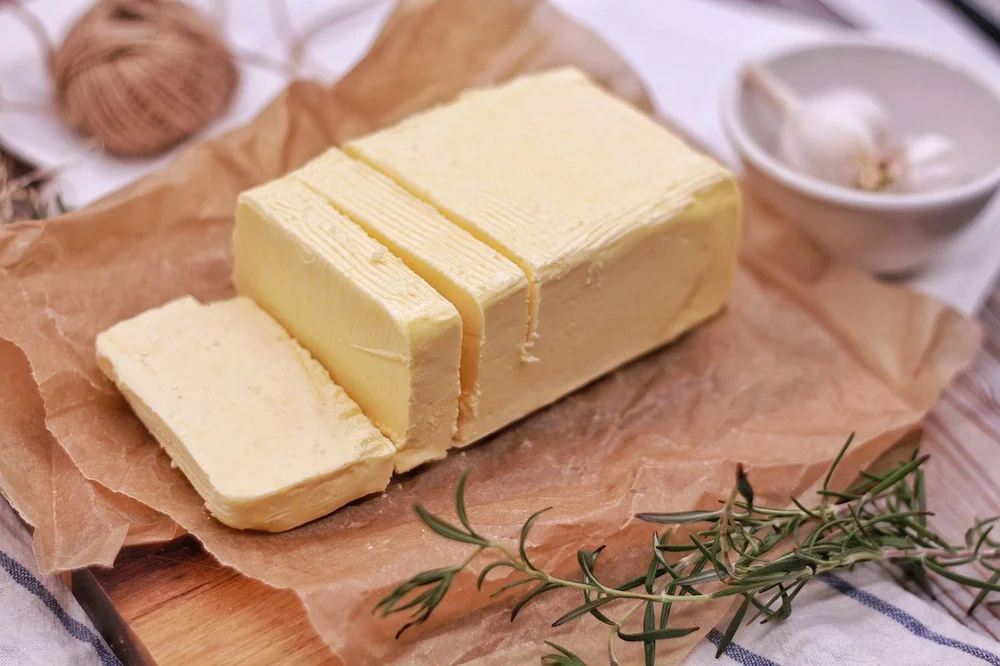
Let's talk fats
Oh yes, let me be clear: this is not just about the meat we are consuming. This is also about the other products we consume from animals, specifically the dairy. When milk comes from a pastured animal, the vitamin content will be higher in those all-important fat soluble vitamins A (retinol) and K2, necessary for skin health, intestinal lining integrity, brain health and bone health too.
For the animals that are to live their lives out in a conventional way (aka CAFOs, or confined animal feeding operations), their diet is drastically different than what their systems were meant to handle; they are also supplemented with extras like antibiotics to help support their health, as a health management tool if you will in order to ensure good profits for the farmers.
Surprise though, those antibiotics end up actually fattening the animals up faster, in order to get them sooner to slaughter. The problem is, an estimated 80% of the world's antibiotics are being used in agriculture. Such a huge amount of antibiotic use is now contributing to creating superbug infections in humans, due to antibiotic resistance as outlined by the World Health Organization.
What does this mean? The frequent use of those antibiotics will harbour a space where bugs can build resistance, and no longer respond to our number one weapon, our antibiotics. That is NOT the situation we want to be in.
Furthermore, the antibiotics in the animals remain in the meat we consume, and these contribute to wiping out our own gut flora. This means consuming meat that has been raised conventionally will have a negative impact in throwing our microbiome/gut bugs/flora/probiotics out of balance, which will contribute to further inflammation in our bodies and toxin load on our livers.
Antibiotics are not the only supplement these feedlot animals are fed. Some get hormones and steroids supplemented, and their feed is not the kind of food the animal was meant to consume, nor made to digest.
Imagine when you have a serving of a food you have trouble digesting. Know how you feel? Imagine having that meal every day. While being crammed in a small space. With a lot of other animals that feel like you do. Those are not conditions that are supportive to the animal; they contribute to higher stress levels too.
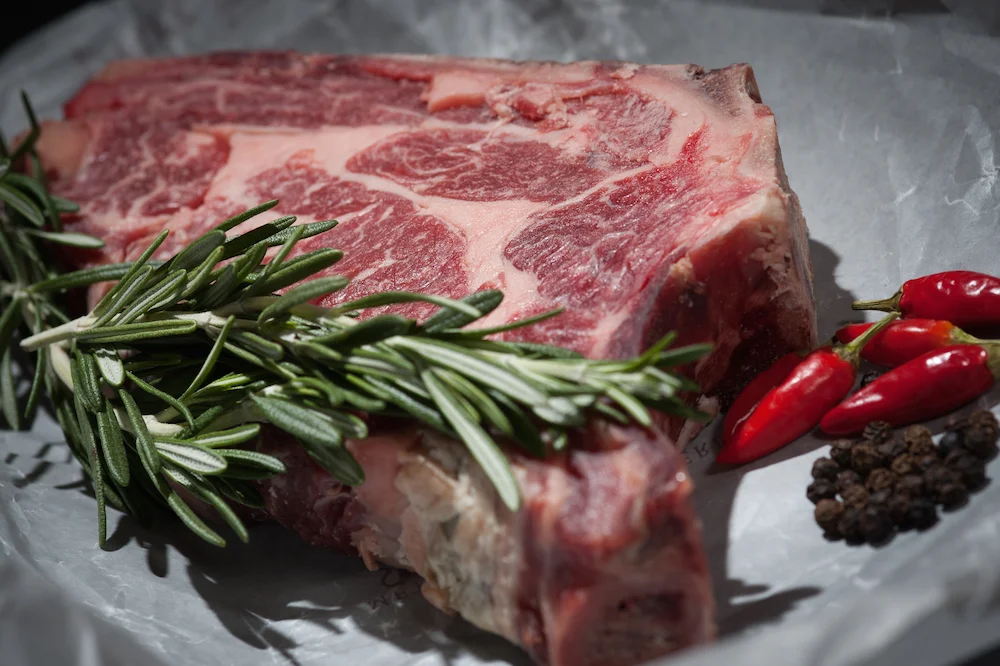
Back to the fat
And where do these toxins get stored? Always in the fat. So consuming fats from pastured animals will better serve you, my friend than reaching for the sources from conventional animals. By choosing butter or milk from a pastured cow, you will be reducing the toxin load your body has to deal with. And will get better nourishment from those food sources, as they will be higher in the fat-soluble nutrients.
But dairy is not the only fat source from an animal; if you are consuming cuts of meat from a pastured animal, go ahead and eat the fat!
Rendered fat from a pig is called lard and fat from a cow is called tallow. When the lard or tallow comes from a pig or cow that was fed on pasture, the nutritional profile reads such great amounts of Vitamin A in retinol form, the animal version we need for the health of our intestinal lining. It is also a fabulous source of Vitamin D3, a key player in thyroid function, essential to our immune health and bone building and maintenance to mention a few.
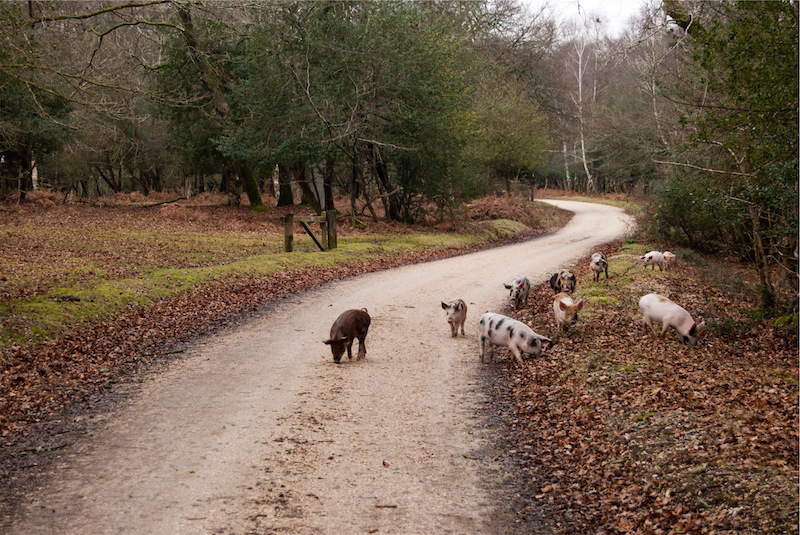
happy pigs
Consume meat from an animal that has been raised on pasture and you will be making a choice that will support your gut flora, not to mention up the nutritional ante of your meals. Those fat-soluble vitamins are critical for our optimal health!
For the love of your skin, your intestines, your brain, your bones, your glandular system, your reproductive system, heck for your lovely body from head to toe, aim to reach for animal products from animals that were fed on grass more often than conventional sources and your body will thank you.
If you're new to pastured meats or grass-fed products, may I suggest contacting Alberta Farm Fresh Producers Association, an organization working to connect local farms and local people. Come August this year, Alberta Open Farm Days will be on again; follow their missives on how they work to connect local farms with people in the province at their website.
I also have connected with a few local small farms that specialize in pastured animals; look for them via my facebook page (Scroll down to 'Liked by This Page'). If you're a local producer, I would love to connect!
And it's a good-better-best kind of scenario, friends. If you're new to consuming pastured products and are put off by the higher cost, start by going 40/60, and adding a few good things at a time. Or purchase cheaper cuts of meat to get started; you can also eat smaller amounts of meat, knowing it is more nutrient-dense you don't have to consume big cuts.
You will find an interesting series exploring Red Meat online here. Chris Kresser explores the health benefits of nutrient-dense red meat in a series of articles, and includes some yummy recipes too. Looking to explore the environmental impact a bit more? This series may be for you.
And if you're really curious to understand a bit more about the health and environmental benefits of consuming products from animals raised on pasture, might I point you to this comprehensive article from the Weston A. Price Foundation called Splendor From the Grass.
MONDAY BASICS: stock up.
The nights are cooler. Some of us have to cover our gardens for fear of the goods perishing under the waning moon. We start to turn inwards, as the daylight gets shorter and the furnace turns on. It's time to get a slow simmer going on the stove.
It's time to Stock Up.
The nights are cooler. Some of us have to cover our gardens for fear of the goods perishing under the waning moon. We start to turn inwards, as the daylight gets shorter and the furnace turns on. It's time to get a slow simmer going on the stove.
It's time to Stock Up.
You have probably heard it by now, and if you haven't, I think you should come out from under that rock. Bone Broth. Stock. Chicken Stock. Meat Stock. It's all the rage. And with good reason! This frugal save-your-scraps kind of cooking that our grandmothers' grandmothers were doing, and all grandmothers before them (in all walks of life, and all parts of the world) has been an integral part of the diet in just about every culture around the globe. Food was never a plentiful thing; grocery stores have only been on the scene since the late 1920s. You used to have to cook from scratch all the time. And you used every morsel you had; nothing was wasted. That is the food with which our bodies and our genetics evolved for countless generations. It's time to bring it back to the table.
Chicken feet poking out of a chicken meat stock chez moi.
To be clear, we're not talking tetra packs of stock or broth; we're also not talking about the powdered or cubed kind of 'insta-stock' either. Sorry to disappoint.
Sure, there are places for these types of manufactured stocks or broths, but they won't impart the health benefits that a real deal from scratch kind of meat stock or bone broth. So know that when I'm referring to meat stock or bone broth in this article, I'm talking about simmering in your own kitchen some bones with or without meat on them with a few added tasty things.
Want to bypass the written word here
and just get the gist via a short video? Voila, mon amie!
Meat Stock vs Bone Broth
These terms seem to be interchangeable; and certainly when it comes to following a recipe that calls for either meat stock or broth, you can use easily substitute with what you have on hand. I want to outline here though the difference between a Meat Stock and a Bone Broth in order to help clear up the confusion.
The clarification between the two became crystal clear when I spent a long weekend in Colorado two years ago with the lovely Monica Corrado, a Traditional Foods Chef and Teacher, as well as a Certified Nutritional Consultant who put together a fabulous weekend of cooking for the GAPS Diet, a revolutionary diet from Dr. Natasha Campbell-McBride intended to 'heal and seal' the gut. It was here that I learned there are massive differences between the Meat Stock (let's call it MS) and Bone Broth (let's call this one BB).
A bone broth (BB) is a traditional kind of broth cooked with the bones of an animal for a long time at a wee simmer. A meat stock (MS) is a shorter cook time of bones with meat on them, on a low simmer. The big difference? The time the bones or bones+meat will simmer for.
MS=short, BB=long. MS=meat+bones, BB=bones.
This is not where the only differences lie, however. If you're like me and are working on improving your gut health, you may have run across a few issues when consuming a long cooked stock. I remember when my kiddo was wee, I made a vietnamese soup with bone broth I had cooked for the requisite 72 hours they called for in my early days of Nourishing Traditions exploration. Within an hour and a half of chowing down the good soup, I fell apart. And I mean that quite literally. We were at my kiddo's dance studio at the time; thank goodness my in-laws were there to take her home. I was escorted out the door via the ambulance as I had a pretty violent reaction to this long and slow simmer of a stock as it messed with my body. I'll spare you the images, but know that it wasn't pretty. They couldn't explain what happened to me, or why I reacted the way I did. They chalked it up to food poisoning; I was left scratching my head as my daughter and I had eaten the same foods, yet she never reacted like I did.
It wasn't until I attended this weekend cooking retreat with Monica Corrado that it all came into focus: this long, slow simmer of a stock was at the root of my troubles that day. And quite a few times since then. I was cooking like the folks who know these things were cooking it; I was following the rules. Why did I feel so rotten?
It is the long, slow process that concentrates amounts of glutamic acid in the final product. Monica goes in to a brilliant explanation on the troubles with glutamic acid for those with digestive complaints in this article, I highly recommend you take the time to read through in order to undertand what is happening here. Her conclusion? For anyone with a compromised digestive system (read: intestinal permeability / autoimmune disorders / any diagnoses with the nervous system like ADHD or seizures or depression or anxiety / any digestive diagnoses like IBS IBD or Celiac), you must stick to the shorter cook times, keeping to a more nutrient-dense short cook meat stock.
Fret not though; bone broth will come in to the picture further on down the road, once some of that support to the gut starts to take hold. Cooking for a shorter time reduces the amount of glutamic acid, which is a substance that can exacerbate any kind of physiological concerns you have that are related to the gut (which is just about everything.)
The other thing to think about when making a meat stock or a bone broth is the amount of histamines in the final product. If histamine overload is a problem for you (migraines, acid reflux, chronic pain, hives, allergies, urticaria) this is important information. The longer the cook time, the higher the amount of histamines produced in the final product. Whenever there is an issue of histamines, you can rest assured there is a need to look at reducing inflammation in the individual. How to reduce chronic inflammation? Short cook meat stock, to the rescue. Lower in histamines than a long cook BB, the MS will be a nutrient dense way to support your intestinal lining, in order to reduce inflammation at the source and therefore, radiating outwards.
Why make stock or broth?
The health benefits of including this elixir in your dietary regimen are everywhere these days. This stuff is golden when it comes to supporting collagen production in your body, a substance we need for every skin cell in our body including those all important skin cells of our intestinal lining. MS and BB are both rich in nutrients necessary to support healthy cartilage and connective tissue, including bones. They are easy assimilable forms of protein for the body, making it a super nourishing drink for anyone feeling under the weather or facing a serious health challenge at this time. They're a great source of nutrients when you're in repair or building mode (like say, mending that broken leg of yours or making a baby).
If you or anyone you love has been diagnosed with osteoarthritis, rheumatoid arthritis, scleroderma, psoriasis, any kind of autoimmune disorder including that of the thyroid, any type of digestive disorder like IBS or Crohns; anyone in your life working on a cancer diagnosis, any kind of motor-neuron disorder or degenerative disease like MS or ALS; for the person looking to support mental health and balancing moods or decreasing anxiety; anyone looking to upkeep their body's functions for high performance sports or fitness endeavours; anyone looking to age like a champ; consuming meat stock (and bone broth in some instances or at some point down the road) can be of tremendous support.
A low, slow simmer is key to making a meat stock that will gel.
Let's go over how to easily make a meat stock. For today's blog post, I am going to stick to a chicken meat stock for the sake of simplicity. I will be including other meat stocks in my repertoire as the months go by and cooking classes get built. But for now, let's look at what it takes to make a good ole meat stock.
POULTRY MEAT STOCK inspired by Monica Corrado of Simply Being Well
The players
a chicken or duck or quail, whole
if you're not too squirmy about it, a package of chicken feet or chicken backs and necks
enough filtered water to cover
2 tbsp of something acidic like apple cider vinegar, lemon juice, or juice from a ferment of sorts
The How-To
Put your bird and chicken feet / backs / necks in the biggest stock pot you own. Top with enough filtered water to cover your bird. Add your acidic medium. Let it sit for 1 hour. (This is to pull more minerals out of the bird into the stock.)
Turn your stovetop on, bringing the meat stock to a slow and gentle simmer. Skim off any impurities that show up. Allow this brew to bubble for a good hour and a half, with the lid off.
Turn your stove top off; strain your entire soup through a sieve, hanging on to the whole chicken. The juices you have collected are your meat stock. Good work. SAVE THIS AND SAVOUR IT.
The whole chicken you have strained is ready for you to debone, and reserve all of the good meat. This is what you can stash in to little freezer bags or containers and have at the ready for easy and simple meals during weeknights, or to add to salads for a nourishing lunch.
What to do next
Take that meat stock, allow it to cool and pop into containers in the freezer for easy meals.
Fill an ice cube tray with this meat stock and freeze individual ice cubes for those times when you need just a dab of stock to thin a gravy out, or steam some greens or cauliflower, or want to braise a veg.
Drink this stuff like tea; add miso paste to it after heating, add some chopped chives and/or seaweed, swirl an egg in it. A nutrient-dense snack that bigs and littles will love.
Save the meat stock, return the pot to the stovetop and add a good solid cooking fat like duck fat. Saute in this a chopped leek, add a few chopped carrots and celery, a few garlic cloves, toss the shredded chicken in and the meat stock, and add a couple of handfuls of slivered greens like swiss chard and parsley. Adjust the flavours, the S+P to make a delicious stew. If you have some pesto, throw that in the mix to make a chicken pistou stew. (Who doesn't want to make that just to say that's what they made? Chicken Pistou Stew. Say it out loud.)
Good add-ins
I love to boost my meat stock with additional herbs or veggies to increase the nutrient density of said stock. Think of adding any number of these things when next you brew. Add them in to the soup pot at the beginning of your meat stock:
a chopped onion (sulfur! Detox superstar! Liver lovin at its best!)
a few chopped carrots and celery (added minerals! And yum flavours!)
any limp looking veggies from your crisper you're wanting to move (except things like kale, radishes, cauliflower or broccoli; their taste is better suited in the final product than in the simmering-stock stage)
a handful of fresh herbs like parsley or rosemary or thyme (minerals + flavours)
a few bay leaves (a traditional flavour for meat stock)
a few dried herbs like nettle or parsley (for anti inflammatory support)
a few peppercorns (a traditional flavour enhancer for meat stock)
a slice of seaweed like the kombu in the photo above (incredible mineral powerhouse, and detox and liver and immune loving support) – any seaweed will do
a few dried shiitake mushrooms (additional immune support)
some medicinal mushrooms like reishi or chaga mushrooms (excellent adaptogens that support adrenals, immune system, everything from head to toe)
additional herbs like astraglus root slices (immune support) or turmeric root slices (incredible anti-inflammatory support)
I keep a freezer bag going in my freezer where I add my vegetable scraps from meal prep during the week. I add the carrot tips, celery leaves, onion skins, garlic skins, carrot greens, parsley stems, fresh shiitake mushroom stems, etc to this bag with the express intention of using it in my next batch of stock. When the bag is full, it's time to put some stock up. (Don't fret about this too much – you're straining these goodies out of the final product.) (Onion skins lend a beautiful golden colour to your stock.)
Ready for the freezer.
If you've made your meat stock well, allowing it to come to a slow simmer, not used an excessive amount of water (use enough to cover the bird, and you should be good), your end product should gel upon cooling. This will happen especially if you have some connective-tissue rich feet, heads, necks or backs in the mix; it's worth seeking them out and adding them to the mix! If it didn't gel, do not despair: this is still good stuff to eat! Adjust your water next time, or keep a more watchful eye to make sure the simmer is slowly bubbling.
Once it has cooled, go ahead and store the goods in the freezer. I'd aim to use it up in 3 months' time; it never lasts that long at our house. We have a weekly soup night; plus I often make myself a good cuppa with an egg swirled in for my breakfast on short-on-time-mornings.
If you're looking for a cookbook that could catapult you in to soup making things and broth and stock recipes, track down Monica Corrado's Grandmother's Kitchen Book. I have a well worn copy that lives in my kitchen and is referred to on a regular basis. At the same link, you will find Monica's e-book on Meat Stock and Bone Broth, an essential in any kitchen looking to support gut health. You may also want to purchase a copy of the wonderful book Nourishing Broth: An Old-Fashioned Remedy for the Modern World by Sally Fallon Morell and Kaayla T. Daniel. While they do not differentiate between a meat stock and bone broth in this cookbook, you will find this book has myriad recipes and ways to use the nourishing stocks and broths you will be making. Delicious recipes!
OK friend. You got this. Go make some meat stock. And play with your food, if you please'm.

MONDAY BASICS: lunchbox planning.
The cooler nights are here. The tomatoes are ripening on the double. You've pulled out your first pair of socks in two months. You've stood in amazement at how much your little one has grown in the past two months in the sun. It can only mean one thing: it's time to think of lunch boxes.
The cooler nights are here. The tomatoes are ripening on the double. You've pulled out your first pair of socks in two months. You've stood in amazement at how much your little one has grown in the past two months in the sun. It can only mean one thing: it's time to think of lunch boxes.

Obviously it means more than one thing. But today's blog post is about developing a method to the lunchtime madness, be it for your littles who are away at school or daycare, or be it for the bigs in your life (including you!) who are keen to amp up the good food and make lunch a tasty and nourishing thing. We'll round it all out with a good list of quick ideas for lunches, and point you to a few good spots online for tote-friendly recipe roundups.
If this meal is for a little
Keep it simple. Repetition is a-ok. In fact, some children really thrive on predictability and the security of knowing what their lunchbox contains. If your child is one who likes surprises, still stick to the same lunches but add one small compartment with a surprise in it that is different every day.
Involve your children in the preparation! They are never too young to participate in food choice and prep. I think it is a big part of parenting and guiding them in this world, so get them in the kitchen. Take them grocery shopping, and give them the choice of veggies and fruit they would like to try in the coming week's meals. If they pick a packaged item from the shelf, read through the list of ingredients with them and help them decide if this is something with which they want to fuel their bodies. Have them help with a batch cook prep session on Sundays say, where they chop those veggies and fruit they're going to eat this week. They can cut them in to pieces and in to containers in the fridge. This will make meal assembly a breeze in the coming days.
For my daughter, as she is now preparing her own lunch, we sat down together to drum up a list of what type of meals she can pack for herself on what days. She has always loved the security of a routine, and so loves to have the same meal every Monday (tuna salad), and every Tuesday she counts on a mini pizza, and Wednesdays are for thermos meals, and so on and so forth. It takes the guesswork out of what to make, almost like the plan has been pre-decided and all she has to do is follow the plan. Which is easy, and certainly do-able for her. We went over the concept of what types of things to include in her lunches, always ensuring there is a good protein and a good fat, along with a vegetable or two every day. Not only does she enjoy making her lunches (I know, the school year hasn't yet started... (I promise she did this last year and was a champ)) she actually eats more of it too, meaning she has the fuel she needs to get through the day of school work and play. And I am throwing less soggy, spent good food in the garbage at the end of the day.
Think of themes for those days as a jump off point perhaps. Mondays = tacos; Tuesdays = soups; Wednesdays = eggs; Thursdays = salad; Fridays = pizza. This list can come from a 10 minute brainstorm session where everyone pitches in. What are your family's favourites?
We have a hand-drawn calendar on our corkboard in the kitchen that my kiddo refers to when preparing her lunch the night before; in this last week leading up to school is the perfect time to get them to build this calendar. They can design it themselves; or you may want to use a pre-made one. I found a few bright and colourful what they call free 'printables' online, you may want to check them out.

Whether you are preparing for a kid-friendly lunch or a meal at your desk or in the work lunchroom (think of the $$ you will save from not going out! and how much more nourishing the food will be!), there are a few good tips that apply to both.
Freezing smaller portions of things like roast chicken, extra pulled pork meat, or other things of the like can be done in easy portions by first doling them out in to silicone muffin trays or ice cube trays. Once they've had a few days to firm up in the freezer, pop them in to a freezer bag to keep them fresher and to keep them from drying out. They'll make for easy peasy meal prep in no time flat! Look for a list of ideas using this method below. (One of my favourites is to freeze pesto into cubes. Adding one to last night's dinner makes it a whole new meal for lunch today! Add one to some frozen stock, throw in the leftover side veggies from supper and add some roast chicken and lunch is served.)
Interested in bringing something liquid to lunch? Salad dressing? Apple sauce? Yogurt + fruit? I highly recommend picking up a flat of 1/2 cup sized glass 'mason-style' jars from Canadian Tire or your favourite grocery store. They seal up like a dream, preventing those sloppy messes from taking over the backpack or briefcase. Bonus, they're fairly easy for littles to open at school. I hand these half cup jars out at some of my classes; they're the perfect size to make enough salad dressing for a few days so that you only need bring it to work on Mondays. It can stay in the fridge at work for the rest of the week, one less step to think about when preparing your meals for the rest of the week. (Remember this post on making your own salad dressings? Worth a recap to understand WHY you'd want to make your own.)
Sandwich or wrap popular ideas chez vous? Might I recommend you go for a sprouted grain product instead of straight up white or brown bread (whether gluten-free or gluten-full). It's the same idea behind this story here about the fox; choosing a sprouted grain product will be immensely easier to digest, and kinder to your system. Think of swapping things out: use lettuce leaves for 'boats' instead of corn tortillas for build-your-own-taco lunch. Use nori leaves to wrap the tuna salad for lunch (although I'd recommend they are assembled only at eating time, otherwise they go soggy). Instead of the wrap, keep the inside components but make it a salad instead. Have them with sprouted grain chips or sprouted crackers instead. Use your liver pate or smoked salmon + cream cheese + chives spread as a dip for veggies!
Another way to have an easier time with grains is to reach for a true sourdough bread instead of a regular loaf. Sourdough is a naturally fermented process which breaks down those nefarious anti-nutrients in grains, inherently making the job of digestion easier. How to know it's a true sourdough? Make sure there is no yeast on the list of ingredients.
Double up and make extra
Next time you're making a pot of soup, or a stew in the slow cooker, consider making a bit extra. If you're roasting a chicken, it's worth throwing in a second one just for the meat you'll have at the ready for easy lunch planning. The extras can easily be frozen in containers or bags into the freezer in single-serving sizes. Taking them out the night before works well, or bringing them to work frozen first thing in the morning prevents them from leaking on the way to work. See? There's a plus to every side, my friend.
A note on thermoses: it's best to preheat the container with some boiling water for 10 minutes, as you are heating up the meal that will be going in. Just make sure to dump the hot water before you put your food in. I've been caught a few times with my eyes half open...
I have a wee list of things below, based on whether they're plant powered or animal powered. You'll find a list of thermos-friendly ideas, and freezing-friendly things too. Please add your ideas in the comments below! It takes a village, friend.
Throw some of these ideas together for a nourishing meal in a flash.
Plant-powered small bites
nuts + seeds
olives
avocado
sweet potato chunks
carrot 'coins'
vegenaise + pesto = dip
kale chips
seaweed crackers
popcorn + coconut oil/butter + hot sauce + parmesan (opt)
salad of vegs + salad dressing in a small glass jar
fruit
berries
smoothies (make sure there's a good fat – coconut oil, full fat yogurt, nut butter, cocoa butter)
nut butters on fruit
celery sticks with nut butter and goji berries (fire ants on a log!)
shredded coconut
homemade trail mix (seed + nut + dried fruit + cocoa nibs)
use sprouted grain bread or true sourdough for sandwiches and wraps
use nori leaves for wraps
make nori rolls with tahini, cukes, avocado, sprouts and cut into sushi like pieces
things-on-a-stick (fruit salad this way! Or veggies + cheese!)
easy homemade mini pizzas (naan bread + sauce + toppings)
guacamole + sprouted crackers or chips
pickles (fermented dilly sticks are a great first ferment, and tasty bites)
hummus or babaghanoush with veggies
sprouted corn chips with salsa
apple sauce
fruit crisp
Animal-powered bites
yogurt or creme fraiche + maple syrup + berries
yogurt + granola + berries
cheese
veggies + ranch dip
mayo + pesto = dip
sardines + mayo + celery + curry powder
hardboiled eggs
egg salad
deviled eggs
protein pancakes
pepperoni sticks (with clean ingredients)
farmer's sausage (with clean ingredients)
jerky
pâté or liverwurst
smoked salmon
shrimp
bacon strips
tuna salad (or salmon, or sardines); fish + celery + smashed avocado + curry powder
roast an extra chicken and shred that meat in muffin cups, store in freezer bag for easy portion retrieval
send lettuce or corn tortillas for your person to make their own tacos (+salsa +cheese +sour cream)
Meat salad in a wrap: chicken, apple, creme fraiche, celery, pickle relish
sushi salad (smoked salmon + leftover rice + nori leaves + sesame seeds + chives + avocado)
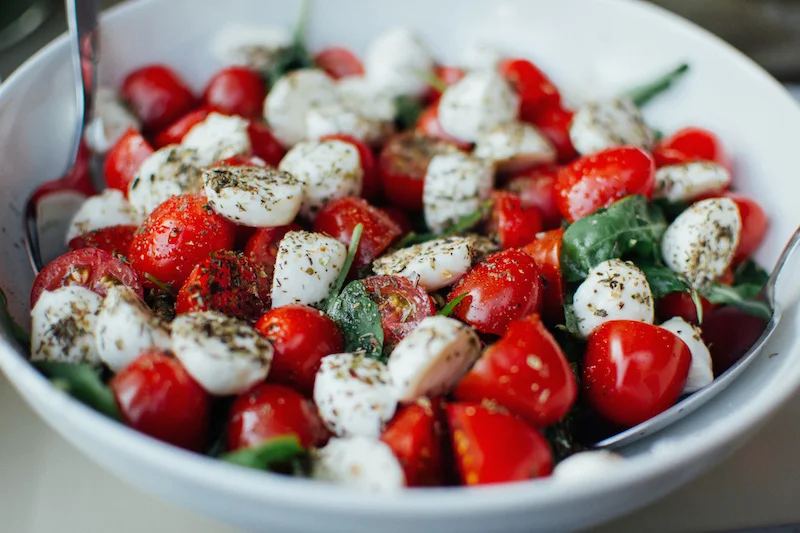
salad of cherry tomatoes + peppers + cucumbers + bocconcini cheese + basil + balsamic
tzatziki + cukes + snap peas
celery stick + cream cheese
1 tbsp butter + 1 tsp honey = frosting, along with an apple or pear to dip
yogurt + chia jam

Good meals to cook extra for the thermos
cook extra sausages at dinner
meat stock + seaweed + chives
chili
make a big batch of soup or stew and freeze in individual portions for easy retrieval
make a double batch of your famous meatballs and freeze for easy lunches
make a double batch of your family's best crockpot recipe and freeze for easy lunches
make an extra shepherd's pie and divy it up into single sized portions
refried beans
keep your stock hot in your thermos, and make your own noodle soup with ingredients in a glass jar (veg, garlic, sesame oil, cellophane noodles, herbs); add stock only just before eating
last night's dinner
frozen stock cubes + frozen shredded chicken + frozen pesto cube + hit of salsa or cube of pizza sauce = instasoup
Use silicon muffin trays or ice cube trays to freeze small portions, pop in freezer bags + label
meat stock / bone broth
leftover meat
roast an extra chicken for dinner, and shred the meat for quick easy grab protein
double your recipe for pulled pork and freeze the meat for quick easy grab protein
pesto (great way to jazz up lots of things, and change the flavour of a leftover)
pizza sauce
blitzed pulse paste (great to add fibre and protein to a quick pieced together meal)
Find more ideas at the blog post on snacking well.
A full roundup of pack-friendly lunch ideas on a pinterest page of mine here
You'll find loads of recipe round ups when it comes to lunch ideas via pinterest. My fave is here.
My only rules: Keep it simple. Routine is key. You got this.
Good luck on your lunch planning! Now go play with your food.
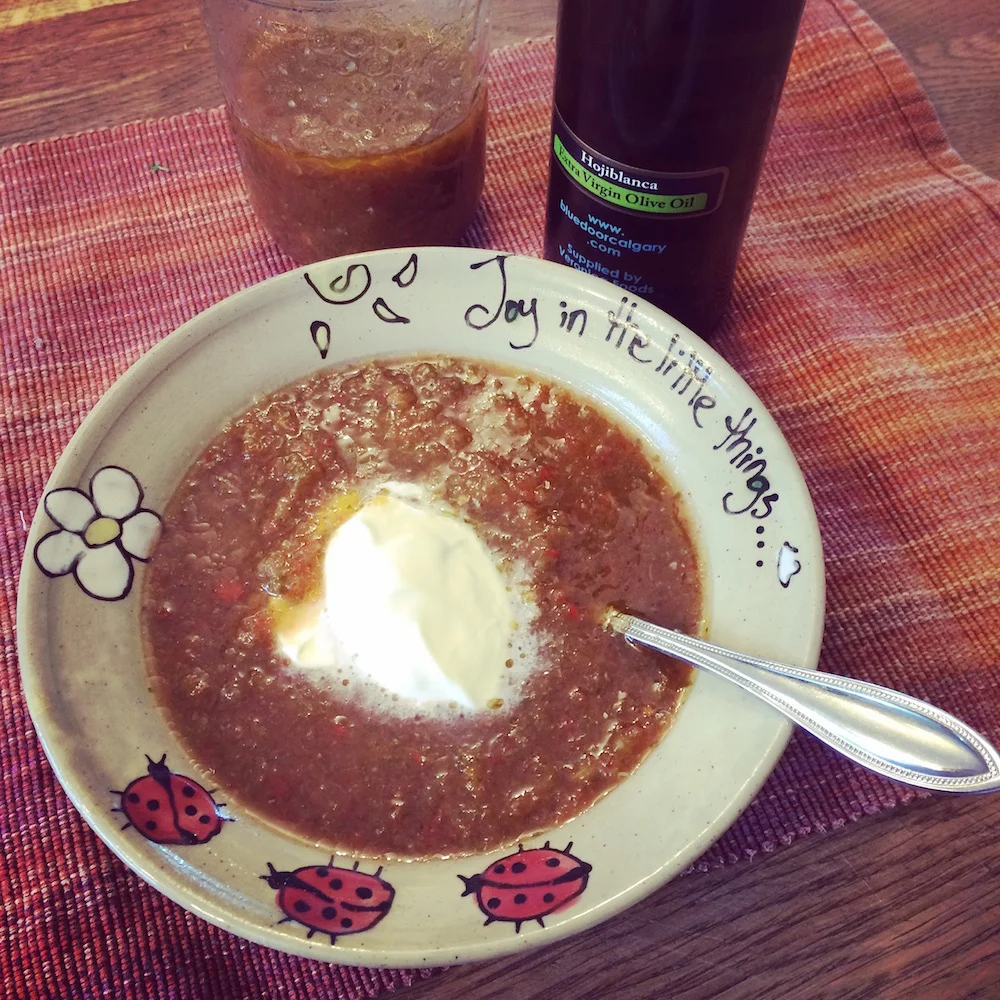
Gazpacho. Fermented.
New recipe on the blog, meant to take in the flavours of the season. Fermented Gazpacho, with flavour spikes from fused olive oil from Blue Door in Calgary, and flavoured vinegar from my wee garden patch. A nourishing probiotic-rich cold soup for the dog days of summer!
This is my story and I'm sticking to it. I had some cucumbers taking up space in my crisper, going a little soft. I had some lovely tomatoes from a local producer I had purchased in anticipation of my own tomatoes ripening at home, and so had to make something with them to make way for the home grown bounty. What does one make when one combines cukes and tomatoes? Well, gazpacho of course!
Being who I am, I couldn't just follow a recipe. Oh no, I had to experiment... I had some time on my hands. So play I did. Here is the finished product: Fermented Gazpacho! I fermented it in order to increase the nourishing aspects and add some probiotics to the mix. I fermented it in order to help it last in the fridge (fermenting extends the shelf life, did you know?). I also fermented in order to develop a really nice sour note to the cold soup; gazpacho just naturally lends itself to flavour explosions. I decided to try my hand at coming up with my own recipe.
FERMENTED GAZPACHO
In a blender, combine until chunky (your desired consistency) or hand chop to pieces in the size you want:
- 5 mini cucumbers or 1 long english cucumber
- 4 tomatoes
- 2 bell peppers (I added colourful ones to enhance the visual glee you get from a gazpacho)
- 1 red onion
- 3 cloves of garlic (minced)
- 1 bunch of cilantro (minced)
- 1 bunch of parsley (minced)
- a handful of chives (minced)
Using a digital scale, pre-weigh a big kitchen bowl, big enough to hold your chopped veg. Mark down the weight of your bowl on a piece of paper, and return the bowl to the scale. Add your chopped veg. Mark the weight of the bowl + veg, and subtract the weight of the bowl: you have the total weight of veg! This is important, in order to know how much salt to use in order to allow for proper lactofermentation.
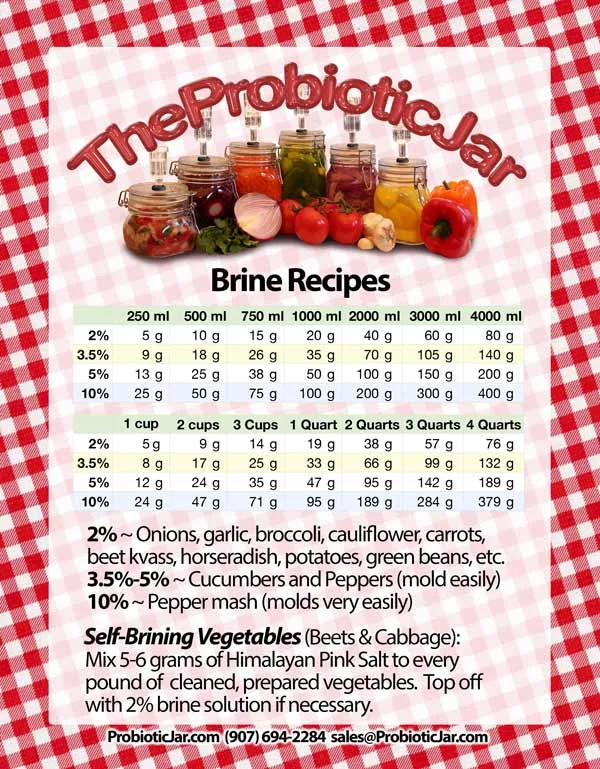
Handy chart to use to measure how much salt to volume. I prefer to measure by weight.
The good folks at The Probiotic Jar can do a much better and thorough explanation of how to figure out your salt brine percentage when making a ferment. See, when fermenting, it is crucial to set up the proper percentage of salt in your final product in order to have that tiny window that allows only the good probiotics to develop, selectively nixing out those that can't live in that salt percentage. This is how you ensure your product is food safe and won't mold, it's by ensuring the proper salt ratio for your ferment. And seeing as this gazpacho had cucumbers and peppers which are prone to mold, I opted to go for a 3.5% brine.
The total weight of my chopped veggies came to 1,623 grams. I multiplied this by 0.035 to get the 3.5% of weight to figure out how much salt to add to this lot. That turned out to be 57g of sea salt. I measured this amount out in a separate bowl using my digital scale, and then proceeded to swap out some of that salt for some leftover brine from a jalapeno+garlic ferment I did last summer. Knowing that 1 tbsp of sea salt can be replaced with 4 tbsp of leftover brine, I then whittled down the 57g of sea salt to 30g of sea salt by scooping out 2 tbsp of sea salt, and I added 1/2 cup of the juice from the jalapeno+garlic ferment, along with a few jalalpeno peppers for proper hit of spice.
It is important you figure out your own amount of sea salt you will need to add to your ferment, in order to ensure it is in that fine range to keep nefarious molds and bacteria out of the final product and make it a food safe venture. Do not follow my measurement, you won't have the same amount of veggies as I did. Each batch is different; it's why I am a big believer in measuring out in grams on a digital scale. It's not as hard as it seems!
Mix the salt + brine (if you are using) in with the vegetables well, and pour your final mix into a fermenting jar that will fit, or a fermenting crock or my favourite, a Fido jar. Make sure the lid is on tight, and if it's a jar you are using, mix your gazpacho every day by tipping upside down and right side up again to redistribute the veggies and salt, in order to prevent mold from developing on the top. If you have your gazpacho in a crock, it might be wise to mix it every day to redistribute the salt and re-submerge the tender veggies.
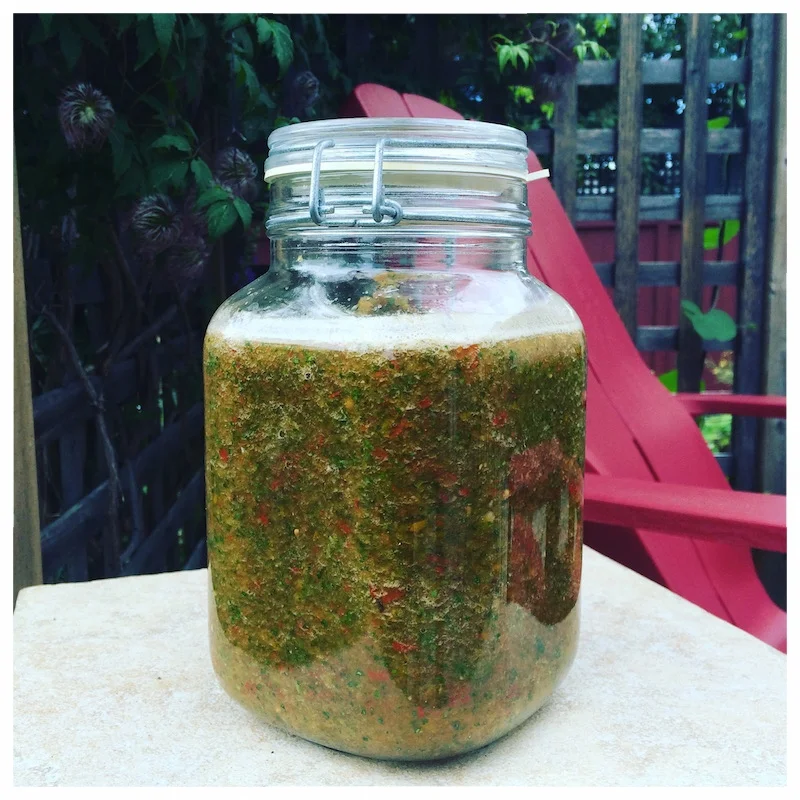
Gazpacho fermenting in my 2L Fido jar.
I let mine sit on the counter for 5 days, but you may prefer the taste at 3 days. It gets a bit more sour as the days go by, so when you decide to tuck in the fridge is completely dependant on your taste buds and preferences.
After the fermentation time on the counter, add to your jar:
- 1/4c flavoured olive oil (I used the Hojiblanca olive oil from Blue Door Oil + Vinegar, but you could use any flavour of olive oil here. Milanese Gremolata might impart that je-ne-sais-quoi!)
- 1/4c red wine or balsamic vinegar or flavoured vinegar (I used my homemade chive blossom vinegar)
- 2 tbsp of lime juice (fresh is best)
- Optional: hot sauce, chipotle peppers, red chili flakes
Mix well, and store the soup now in the refrigerator. Adding these ingredients deepen the flavours of the gazpacho, making each batch a unique offering. Having the good quality olive oil in the mix also imparts anti-inflammatory benefits, and packs on the nourishment and fats to help you assimilate more of the nutrients found in the gazpacho. Up that nutritional ante! Play with your food! And add a dollop of creme fraiche at serving time while you're at it.
The soup will keep for a minimum of 7 days, but I bet you'll run out before the end of day 2.
Bon appetit, les ami(e)s.